Monday, September 17, 2012

Tools of the Trade: The Dremel

Hey guys,

meet the newest addition to my toolbox: The Dremel. I've been eyeing one of these for quite a while and last week I took the plunge and bought myself the Dremel 3000.


I found that using a pin-vice to pin my miniatures, especially the metal ones, was getting to be quite a chore. I recently ordered a bunch of Malifaux miniatures, which are almost exclusively metal, and I wasn't really looking forward pinning them by hand. Because of that,  the Dremel rotary tool will will help me quite a lot. The first lesson I learned using this tool, was only to use the lower settings as the metal miniature would get quite hot if I used any of the higher settings. Also, this would give me much more control when pinning delicate parts.

I'll keep you posted on my experiences with this tool as I learn to use it myself. But so far it was a tremendous help in putting together the Coppelius figure, which was a real pain to assemble. If any of you have had any experience in using a rotary tool, I'm looking forward to hearing about it.

Cheers,


IK-Painter

Sunday, September 9, 2012

Worst Malifaux model so far: Coppelius

This will be kind of a rant...

Yesterday, I've built my Coppelius model. As I have to say this was one of the worst models I've ever built and the worst Malifaux model I've built so far.


What were they thinking, when they were designed this thing? The limbs are so thin, that any kind of pressure will bend the model. Worst of all, the limbs are so thin,  that pinning, is almost impossible. And trust me, you will need to pin  this model, as any kind of pressure will snap the glued parts right off, because connection points are just so damn tiny.

And because of the way this model is cast, the mold-lines are ridiculous. Hard-to-reach and all all over the details of the coat of the model, which made cleaning them up very difficult.

Sufficient to say, I won't be looking forward to painting this one up...

Thursday, August 23, 2012

Creating a narrative with your basing style

Hey guys,

today I wanted to talk about creating a narrative by basing your miniatures. This topic shows, how far our hobby has come over the last 10 years or so. If you look at old pictures, specifically the ones on the boxes of old Games Workshop products, you will notice that they are all based very basically. Usually, the base was flocked, then painted and then drybrushed and the rim of the base painted a different color.

This is usually enough to make the miniature tabletop ready, but but after all the work you had painting the miniature it would be would be a missed opportunity, not to give the base some extra treatment. This way, you can create stunning narrative, which complements your paint job.

If you want to go the extra mile, is important to think about some things before hand. How many miniatures will you have to base this way? Will your way of basing look good on different size bases? Do you have enough supplies to make sure, that all the bases of your army look the same? Will the base complement the paint job of the models? Will you model the base by yourself or will you buy some premade resin bases? And most importantly, will you have fun doing these kinds of bases for your whole army?


1. The "basic" base

Old school basing - Courtesy of http://descansodelescriba.blogspot.de/
In this picture you see that the artist paid very close attention to the paint job of the miniature, but only did a very basic basing job. The basing doesn't do very much for complementing the miniature and somehow the sum of the parts is less than the parts themselves.


2. The "selfmade" base
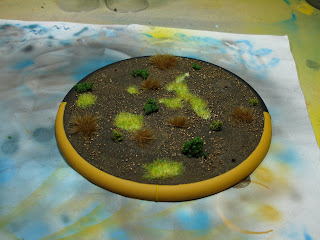
A modeled base, sans narrative.
The same base with bits added for narrative.
On these pictures you see a base with a little bit more effort put into it. The theme is a wartorn battlefield, complete with bits of broken weaponry and armor plates lying around. In this case the base is in stark contrast with the miniature, but adds something to it because there's a story behind it. I used the same technique for all the figures of my Cygnar army.


3. The "premade" base

Resin base inserts - Courtesy of http://www.ironhalo.net/

Another way to go is to buy yourself some premade resin bases. The come in a huge a variety of themes and sizes and can accommodate almost anything you think of.

But be prepared to put a lot of effort into these. They need to be cleaned, washed, primed and painted which can add to a lot of work. Also, if you want to start using these bases for your whole army you will need to stick with them to the end, because else there will be some huge discrepancies in the overall look of your forces.

But if you put the extra effort into them, they can look stunning. I used these kinds of bases for my Malifaux Neverborn Crew and am very pleased with them. Notice, how I vary the colors and style of the bases, but pulled them together  by using the same color for the rim.


In the end, I would have the following suggestions: 

Intricate and detailed resin bases are best for small skirmish type games, where you can put the extra effort into creating stunning pieces, which will complement your figures.

Selfmade bases, which can vary wildly in the effort you put into them,  are great for larger armies by creating some stunning themes.

I would refrain from using only a very basic basing style, because this kind of work can really ruin the whole look of your army.

Cheers,


IK-Painter

Saturday, August 11, 2012

From Zero to Hero: Baby Kade - Neverborn Minion

Hey Guys,

I posted a while back, that I won my first painting contest with my entry of Baby Kade. So here is how I went about painting this fig.

Preview of the finished mini

Progress Report: Juli 2012


Hey guys!

The move is done (still a lot to do, but my hobby area is finished). So here you go, my Progress Report for Juli 2012.


WARMACHINE


Purchased


  • Field Mechanics - Cygnar Unit Blister


Assembled


Work in Progress


  • Captain Arlan Strangewayes, Arcane Mechanik - Cygnar Solo


Finished Miniatures


  • Commander Coleman Stryker - Cygnar Warcaster
  • The Black 13th Gun Mage Strike Team - Cygnar Character Unit
  • Stormguard - Cygnar Unit
  • Hunter - Cygnar Light Warjack
  • Journeyman - Cygnar Solo
  • Charger - Cygnar Light Warjack
  • Cyclone - Cygnar Heavy Warjack
  • Defender / Triumph - Cygnar Heavy / Character Warjack
  • Squire - Cygnar Solo
  • Reinholdt Gobber Speculator - Mercenaries Solo
  • Lancer - Cygnar Light Warjack
  • Thunderhead - Cygnar Character Heavy Warjack
  • Major Markus "Siege" Brisbane - Cygnar Warcaster
  • Stormsmith Storm Tower
  • Sword Knights - Unit Box
  • Storm Strider - Cygnar Battle Engine
  • Ol' Rowdy - Cygnar Character Heavy Warjack
  • Lieutenant Allister Caine - Cygnar Warcaster


MALIFAUX


Purchased


  • Stiched Together (2) - Neverborn Minion
  • Daydreams (3) - Neverborn Minion
  • Coppelius - Neverborn Minion
  • Malifaux Cherub - Neverborn Minion


Assembled


Work in Progress


  • The Dreamer - Neverborn Master


Finished Miniatures


  • Teddy - Neverborn Minion
  • Doppelganger - Neverborn Minion
  • Baby Kade - Neverborn Minion
  • Lord Chompy Bits - Neverborn Master