this time I have something different for you. I recently got a new airbrush, an Iwata HP-C Plus and decided, that my new Cygnar Light and Heavy Warjack Wreck Markers where the perfect place to take it out for a spin.
 |
| Preview of the finished markers |
 |
| My new baby :-) |
I painted both markers almost exclusively with my new airbrush. The only work steps I used a brush for where some drybrushing and the rust weathering.
After cleaning and washing the parts, I applied my trusty Vallejo Polyurethane Grey Primer. I immediately noticed, that the primer was going on much smoother with this airbrush, then with my Paasche Talon, because the paint was atomised much finer.
Because I planned to do extensive weathering on the pieces I decided to forego the highlighting step, as that would have been a lot of work, which would be covered up by the pigments anyway.
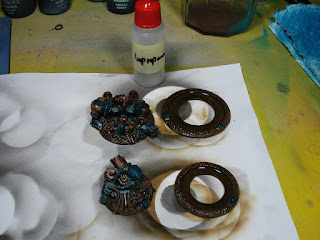
I laid down a basecoat of Vallejo Heavy Opaque Brown, not worrying about overspray. Next, I painted the base of the marker with VGC Hawk Turquoise. This also served to clean up the overspray from the previous step.
 |
| Heavy Brown basecoat |
 |
| Bildunterschrift hinzufügen |
The metals where painted with VGC Brassy Brass and VGC Gunmetal Metal, so that the pieces corresponded well with my already painted forces.
 |
| The metals where a bit tricky to airbrush |
I then applied my Heavy Body Black Wash (after Les‘ Recipe) through my airbrush, which acted as a filter and toned the whole paintjob down considerably. This was the first step in my heavy weathering.
I then sealed my paintjob, so that the weathering wouldn't damage it.
The next step was the only time I used brushes, as I did not wanted to use the weathering pigments in my new airbrush. I just mixed up the three shades of rust and mixed them directly on the wreck marker, concentrating on the silver metal areas, as bronze just doesn‘t rust.
 |
| Before... |
 |
| ...and after the alcohol. |
I hope you liked this small tutorial,
as always, enjoy and have fun!
IK-Painter


0 Kommentare:
Post a Comment