Hey Guys!
Today, I want to walk you through the process of painting a Lancer Light Warjack. My models up to this point where always very new and clean looking - and since I wanted to experiment with weathering anyway, this model was the perfect opportunity to start.
 |
| Preview of the finished model |
When assembling the model, I didn't glue the shield arm in place, because this would have made painting much more difficult. So I worked in sub-assembly on this fig.
For the overall feel of the model I wanted a darker tone, so I choose to prime it black, as that gives the figure a darker and more somber tone.
 |
| Primed and ready for painting |
I first used a 50:50 mix of VMA Steel and VMA Black for a very dark metal tone and applied this over the whole model with my airbrush, which gave a fantastically smooth finish.
 |
| Metal basecoat done |
I then used the sponge technique and some Vallejo Liquid Mask for the first stage of the weathering. I Just used a small piece of blister foam I had to very randomly apply the liquid mask to all the areas on the model, which would get a turquoise coat later. I also used this technique on the front of the shield.
 |
| The masking medium - work quickly, cause it dries very fast |
 |
| The sponge technique |
 |
| Mask applied |
On the shield, I used VMC Ivory, to tie the model in with the rest of my forces.
I then applied a solid basecoat of VGC Hawk Turquoise as the models main color and shaded this with my airbrush, using a 50:50 mix of Hawk Turquoise and Black. For the highlights, I used a 50:50 mix of Hawk Turquoise and White.
I cleaned up all the overspray on the silvery metal parts from the previous step by normal brush, using the same mixture as before. For the bronze parts, I started out with a coat of Vallejo Liquid Gold Copper and highlighted it with Vallejo Liquid Gold Red Gold
 |
| All the main colors done |
I then used a stiff brush to remove all the liquid mask. The result was very natural looking damage.
 |
| Don't be shy, put some elbow grease into the removal |
 |
| The mask removed |
|
|
|
|
|
|
For the next stage of weathering, I wanted to give the bronze an aged patina. I oriented myself on one of Les'
videos for this stage. I mixed up a patina wash as per his instructions, adding a bit more green as to make it pop a bit more. Then I applied to generously over all the bronze areas, making sure not to let it pool too much. I used a 1:3:1 mix of blue to green to white and added approximately 30 drops of Magic Water (water with flow improver added), to get the right consistency for a wash.
 |
| Weathering wash ingredients |
 |
| The finished custom wash |
 |
| The bronze parts weathered |
 |
| The shield is also given the patina wash. |
To make the scratches really stand out, I used VMC Sky Blue as a contrast tone and lined all the bottom edges of the chips. Just be careful not to overdo it, because it's a fine line between highlighting the chips and ruining the whole effect.
 |
| The chips highlighted |
For the last stage of weathering, I wanted to add a nice rust effect on all the silvery metal parts. I used my Vallejo pigments for this task and mixed up three shadeds of rust with my Vallejo pigment glaze, to extent my working time. I randomly added the three colors all over the mini with the same sponge technique I used on the chipping of the armor. I used a fine brush to add dabs of rust to some of the exposed metal chips all over the armor.
Important notice: Always seal your mini with Varnish before using pigments.
 |
| Three shades of rust |
 |
| The rust applied |
In some places the rust effect was too much, so I used some Isopropanol alcohol and a make up applicator to remove and tone the the rust down in the places, which looked too overdone.
 |
| Rust clean-up |
I also used Light Sienna pigments on the feet and legs of the mini, to tie it in with the base and Ash pigments to give the smokestacks a grimy feel.
 |
| Black Pigments |
 |
| Light Sienna |
I also applied a nice little light effect on the arc node on top of the war jack - which stands out all the more, because of the muted colors on the rest of the model. When all the pigment work was done, I sealed the mini with two coats of Matte Varnish - which dulled the model down and brought out all the little details.
 |
| Glossy |
 |
| Dead matte |
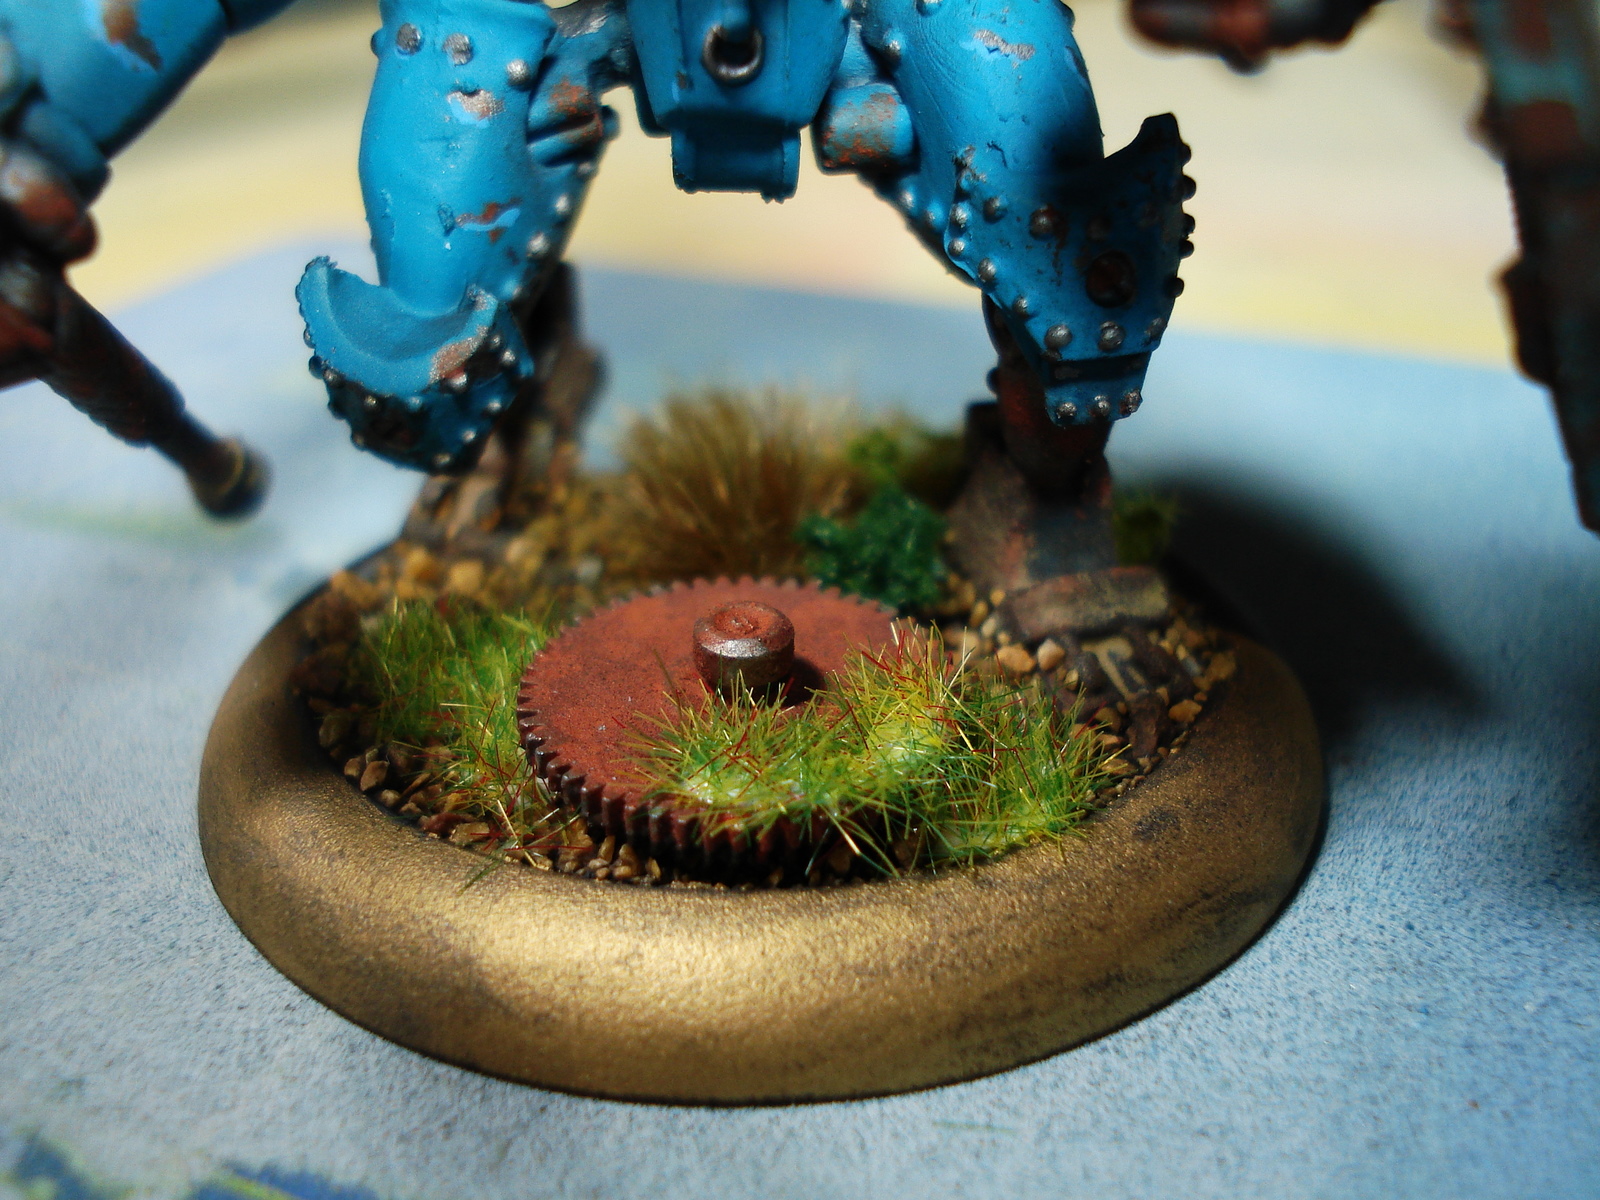
For the base I used the same approach as on all my other minis, mixing different basing materials and weathering a cog, to give the impression of an ancient battleground. As a last step I painted the front arc of the base lip with Vallejos Liquid Gold Rich Gold.
I hope you enjoyed this little tutorial. Working with so many different techniques was also very fun for me, which is the most important thing to have when painting. And now for some shots of the finished model.
Cheers,
IK-Painter


0 Kommentare:
Post a Comment