I finally came around to paint my Hunter Light Warjack - which build I detailed in one of my earlier posts. I started as usual, priming the model grey with my airbrush. and Vallejos Polyurethane Acrylic Grey Primer.
 |
| Primed |
I then preshaded the model with black and set some highlights with white - a step which proved unnecessary because of the direction my project would take - but nevertheless a good way to practice my airbrush skills.
 |
| Preshaded |
 |
| Lightly basecoated |
This was the step, which proved my preshading unnecessary, cause the camo pattern went over all the edges. You can only see some of the original work on the arms and legs of the model, which also is a very nice effect. For shading the top of the mini, I used a translucent color, same as the one I used on the coats of my Black 13th Gun Mage Strike Team.
Because of the stealthy theme, I uses a mixture of 1:1 Chaos Black to Vallejo Model Air Steel for all metal parts and toned it down further with a Heavy Body Black Wash. One drybrush of my original mixture and some hard edge highlighting with Model Air Steel, and the silver metals where done.
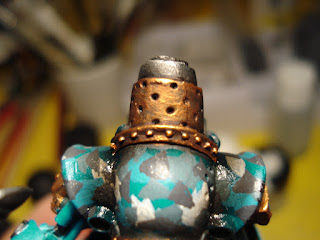
For the gold metals I applied 2 thin coats of Bright Bronze and toned them down with 3 heavy Devlan Mud Washes. They are still bronze, but have lost most of their shine - perfect for a silent predator.
 |
| The ornamental metals bascoated... |
 |
| ... and dulled down with washes. |
The eyes where done, bascoating with Blood red and then adding Orange Fire and Sunburst Yellow, taking care to let the other colors show. The Axe received two washes and was hard edge highlighted with Vallejo Model Air Silver.
 |
| Details done |
For basing, I took the usual approach. Gluing down the basing grit with PVA, looking the sand in with a heavy wash of my Dark Sepia wash and drybrushing it with lighter brown tones.
To make the mini really stand out, I added lots of different basing materials on top of the grit layer. Different colors of clump foliage from Gale Force 9 and a few patches from Army Painters Battlefield Scenics Highland Tufts. To pull the materials together, I added static grass. The effect was that of a dense forest - perfect for the Hunter to strike from :-).
And there you have it, my Hunter Light Warjack. It really stands out from the rest of my army because of the camo pattern, but still is recognizable from its choice of colors.
 |
| I even detailed the furnace and gauges. |
 |
| Ready for action! |
I hope you found this tutorial to be helpful, as always, enjoy and have fun,
IK-Painter


0 Kommentare:
Post a Comment