it's been a while, since I posted my last step by step. But as I've been busy painting for the last few weeks, I was able to finish a few figures. So you can expect a few more painting tutorials in the future.
I'll be kicking this off with my Stormsmith Storm Tower, which was very fun to paint.
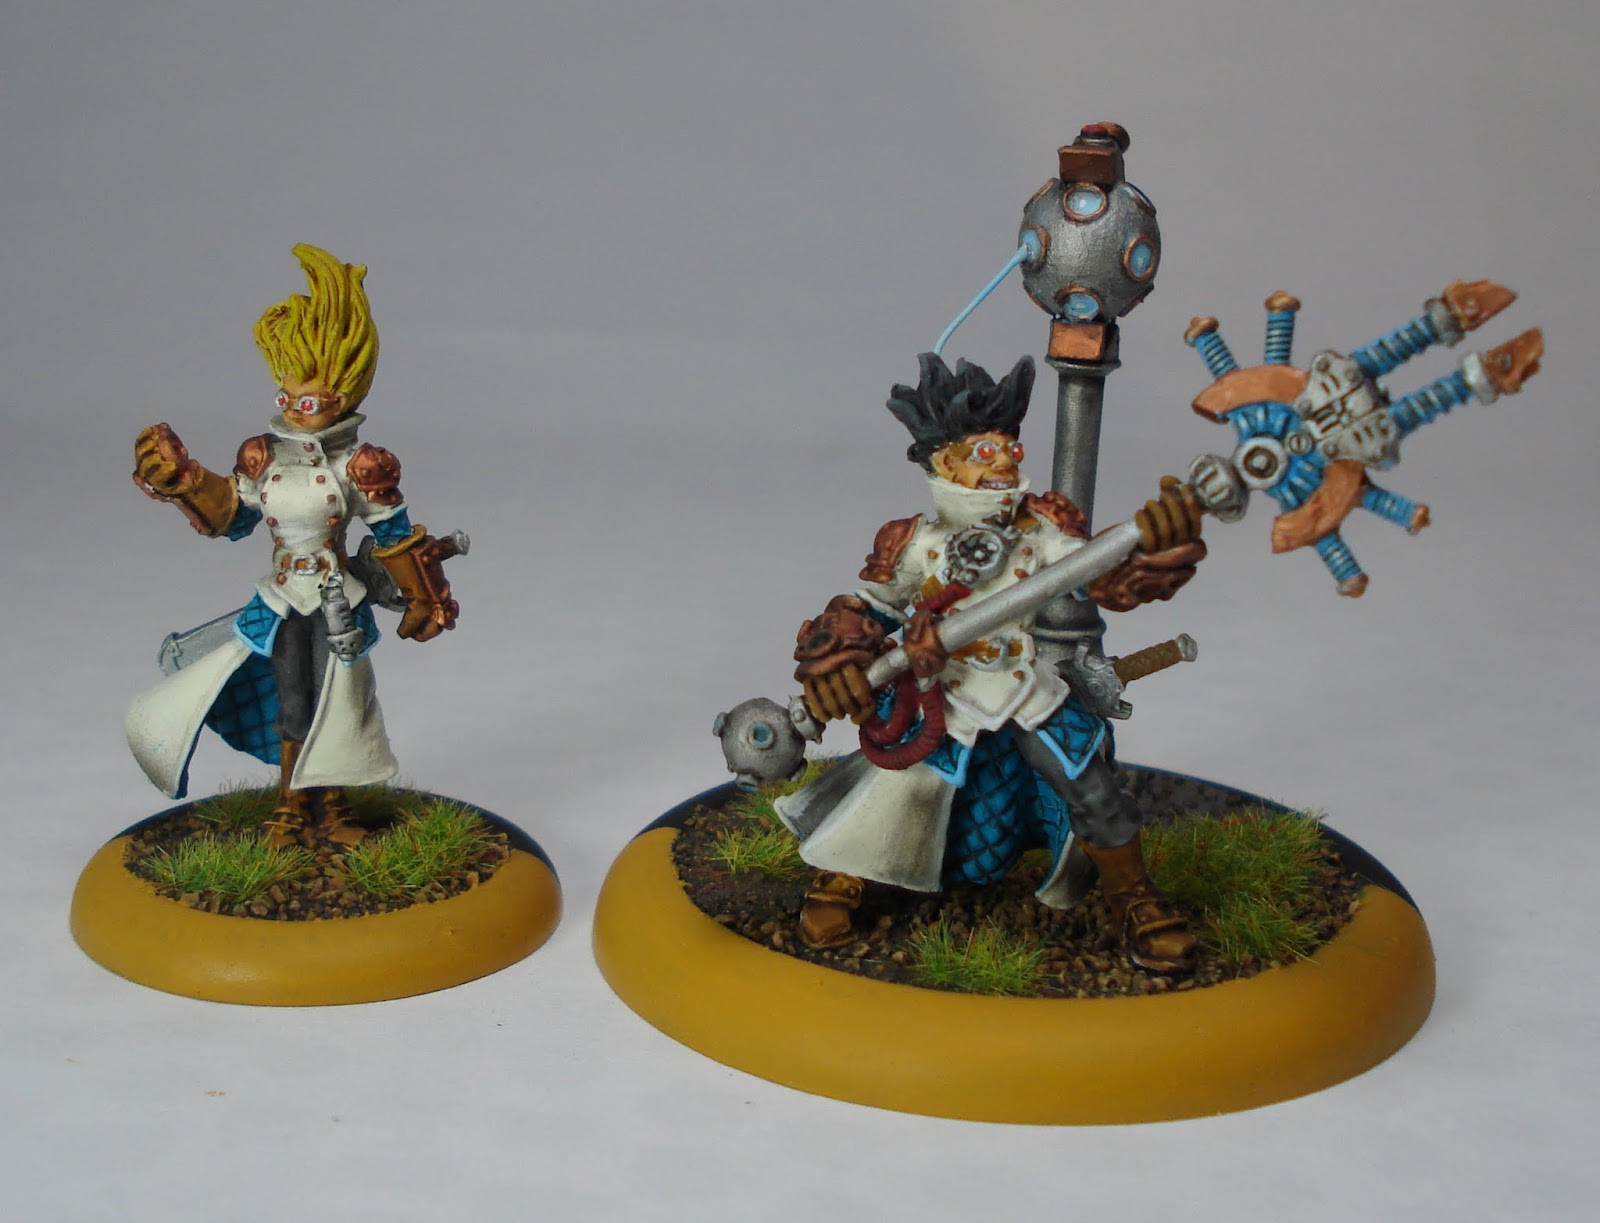 |
| Preview of the finished models |
I started by mounting the figures and the Tower on seperate pieces, so I would be able to paint all the details. I then primed them with Vallejo Polyurethane Grey Primer.
The Tower was airbrushed with VMA Steel and the Details where painted with Vallejo Liquid Gold Copper.
 |
| First details on the Tower |
 |
| Mounted and primed |
As with the rest of my Cygnar forces, the coats where airbrushed with VMC Ivory. The folds where then shaded with Hansa Color Graphite in several thin passes, so they would be very soft. Then I added the first basecolor to the details, like the hair and quilted parts of the cloth.
 |
| First basecolors locked in. |
 |
| Ogryn Flesh for the hair, Soft Body Wash Black for the quilted cloth. |

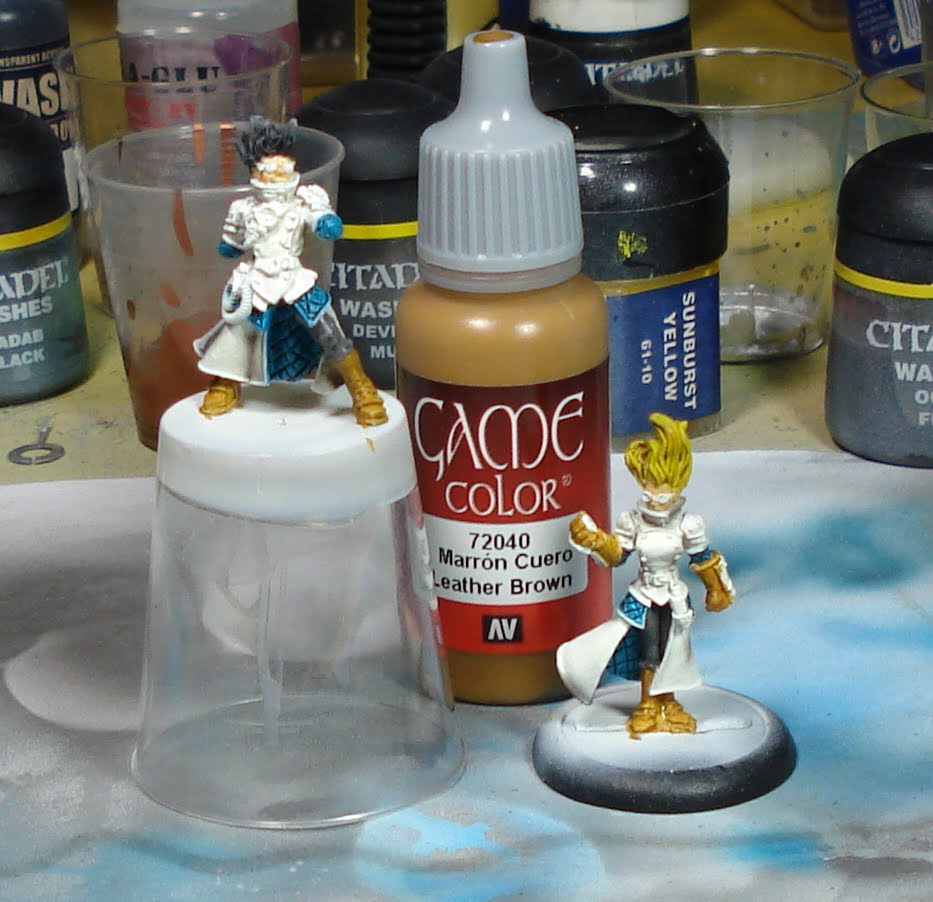
Further basecoats where then painted. VGC Cold Grey for the pants, VGC Elf Skintone for the faces and VGC Snakebite Leather for the Boots and Gloves.

For the hair of the second figure, I decided to wetblend it. I started out with a coat of VGC Black, which was added quite generously and then gradually lighted this color up, by adding more and more grey into the mix. With each lighter shade, I painted less and less of the hair, concentrating on the more exposed areas, making sure to leave some of the darker shade showing. As I was working wet in wet, you can see a very smooth transition between the black and grey shades in his hair.

For depth, the faces where washed with Ogryn Flesh and the leather parts with Devlan Mud - which is a great combo for leather parts, as the darker wash gives the light leather color a very natural and worn look.

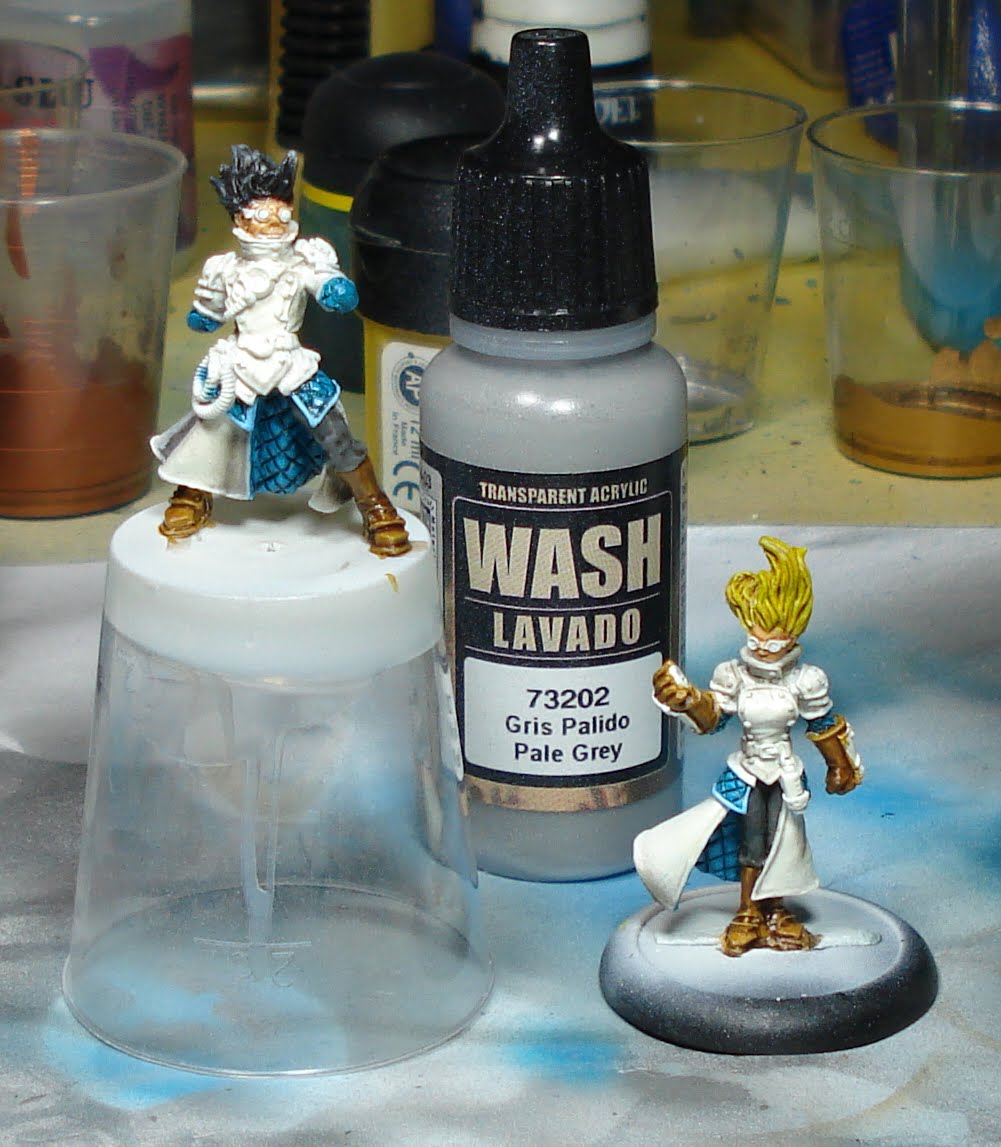
Now for the fun part. I placed a tiny dot of 1:1 mix of VGC Skull White and Hawk Turquoise in the middle of every rhombus of the quilted cloth, to give the impression of a raised area.
 |
| Time consuming but very effective. |
Time to hit the save button. A light coat of Gloss Varnish seals in the paintjob and allows for better handling.

For some added interest, I edged the quilted parts with VMC Sky Blue, which complements the Turquoise quite well. I also pinwashed the upper folds of the coats, which where to hard to get to with the airbrush. For this I used watered down my wash and only placed tiny amounts right along the edges where I wanted them. The gloss coat made a smooth surface, which helped the wash to flow better right into the recesses I wanted.

 |
| Coat pinwashed. |
 |
| Basecoated |
 |
| Masked |
 |
| Black coat |
 |
| Tape removed |
 |
| Cleaned up, washed and varnished |
Time for some detailing. I went back over the figures and painted in any details I might have missed the first time around.


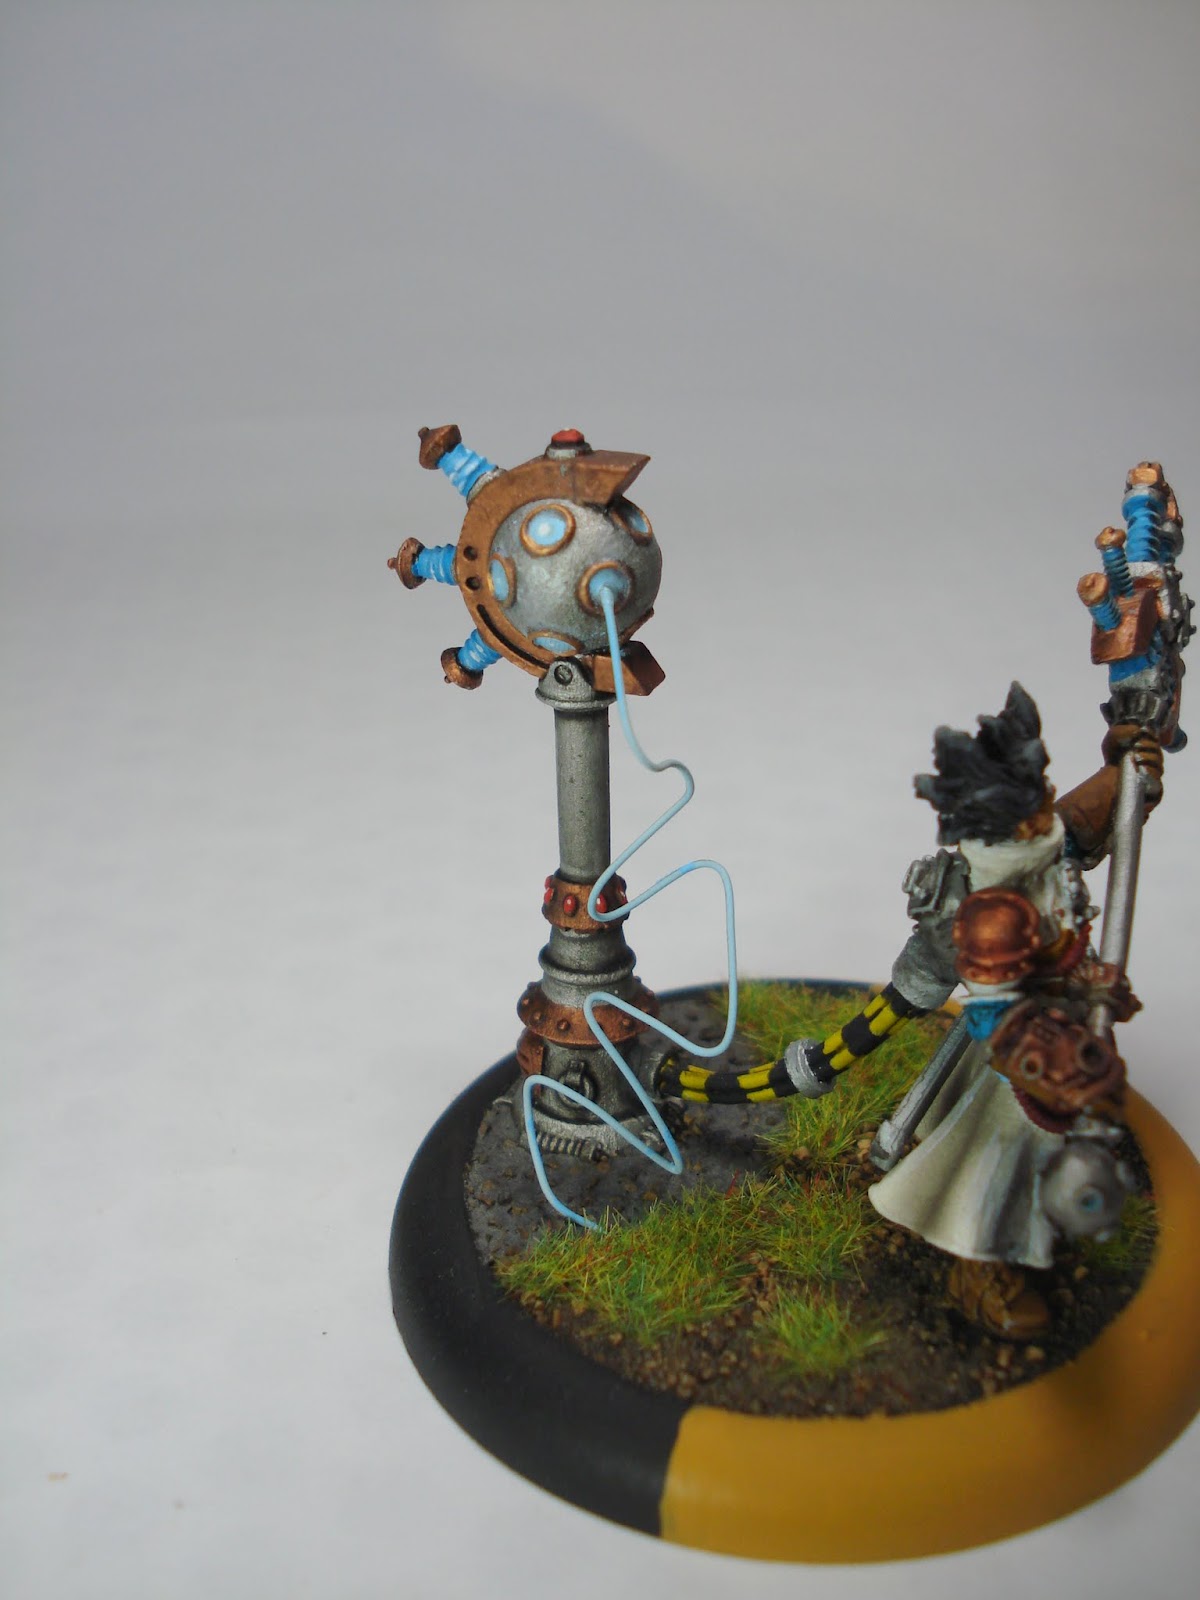
I then assembled the figures and based them. For a bit of narrative on the larger base, I marked a half circle around the voltaic tower off with black pigments, to show the burned earth the electricity would cause. The static grass, which also only goes to this point, further shows the effect.

I then cut a piece of wire, primed and painted it and then added it to the model as a lightning effect, originating from the voltaic tower.


For the parts of the models, which show the electricity, I went with the same approach I used for my Thunderhead tutorial. I based with VGC Electric Blue and glazed my way up to VGC Skull White. For the voltaic tower, I just based with my airbrush and then added a small dot of Skull White in the center of each circle.
 |
| The electric parts basecoated |
I quite enjoyed these models, as they were a nice break from all the armoured knights and Warjacks I painted in the last few days. They came our really well in the end, although you need to spend your time on the details on them, to really make them stand out on the table.
And finally, some shots of the finished models:
|
| Group shot |
 |
| Voltaic tower |
 |
| Base details |

Hope you enjoyed this tutorial! :-)
Cheers,
IK-Painter
Very nice!! Just a quick question.. What are you thinning your VGC paints with?? Im running mine with Regular airbrush thinner (Testors I think) and im having a heck of a time with clogging. Ive heard 70% Iso works as well as Future but Im just curious as you seem to be doing well with yours. Im running a Iwata HP-C+ and a AB depot TC-848 noiseless compressor... if it matters.
ReplyDeleteThe HP-C Plus is a great brush. I immediately fell in love with mine :-).
ReplyDeleteFor thinning, I usually use either Vallejo Thinner or Liquitex Airbrush Medium, both in a 3/4:1 thinner:paint ratio, depending on the paint. I also have some issues with clogging, but I think most of those are because of my sometimes sloppy technique (stopping airflow before stopping paint). But with a .3 nozzle you will have trouble with clogging, even if your technique is flawless. I usually unscrew the needle cap to expose the needle to gently remove any dried paint with the fingernails of thumb and index finger. Or if I'm lazy, I just blast the clog out by force if it starts building up, even if this wastes a good amount of paint in the process ;-)
Cheers,
IK-Painter
Thanks Florian..... It seems we are about the same then, It just seemed to me that it clogged more than usual compared to what I saw from others. I guess its just my overwhelming paranoia about learning something new... I appreciate the quick reply and look forward to seeing more of your wonderful work.
ReplyDeleteMunkey
Hey Tommy,
ReplyDeleteforgot something yesterday. I wouldn't recommend using Isopropanol for thinning acrylics. Don't know if it just was a fluke, but I tried thinning VMC Ivory with 96% proof Iso - it turned to sludge instantly, because the alcohol reacted weirdly with it. In my case it just pulled all of the water out of the paint and then evaporated, leaving an unworkable mess behind.