today I want to walk you through my painting process of the Cygnar Cyclone Heavy Warjack. I started off cleaning and assembling the figure. Because it is plastic and not metal, I didn't pin the model. Instead I used the superglue and green stuff method detailed here.
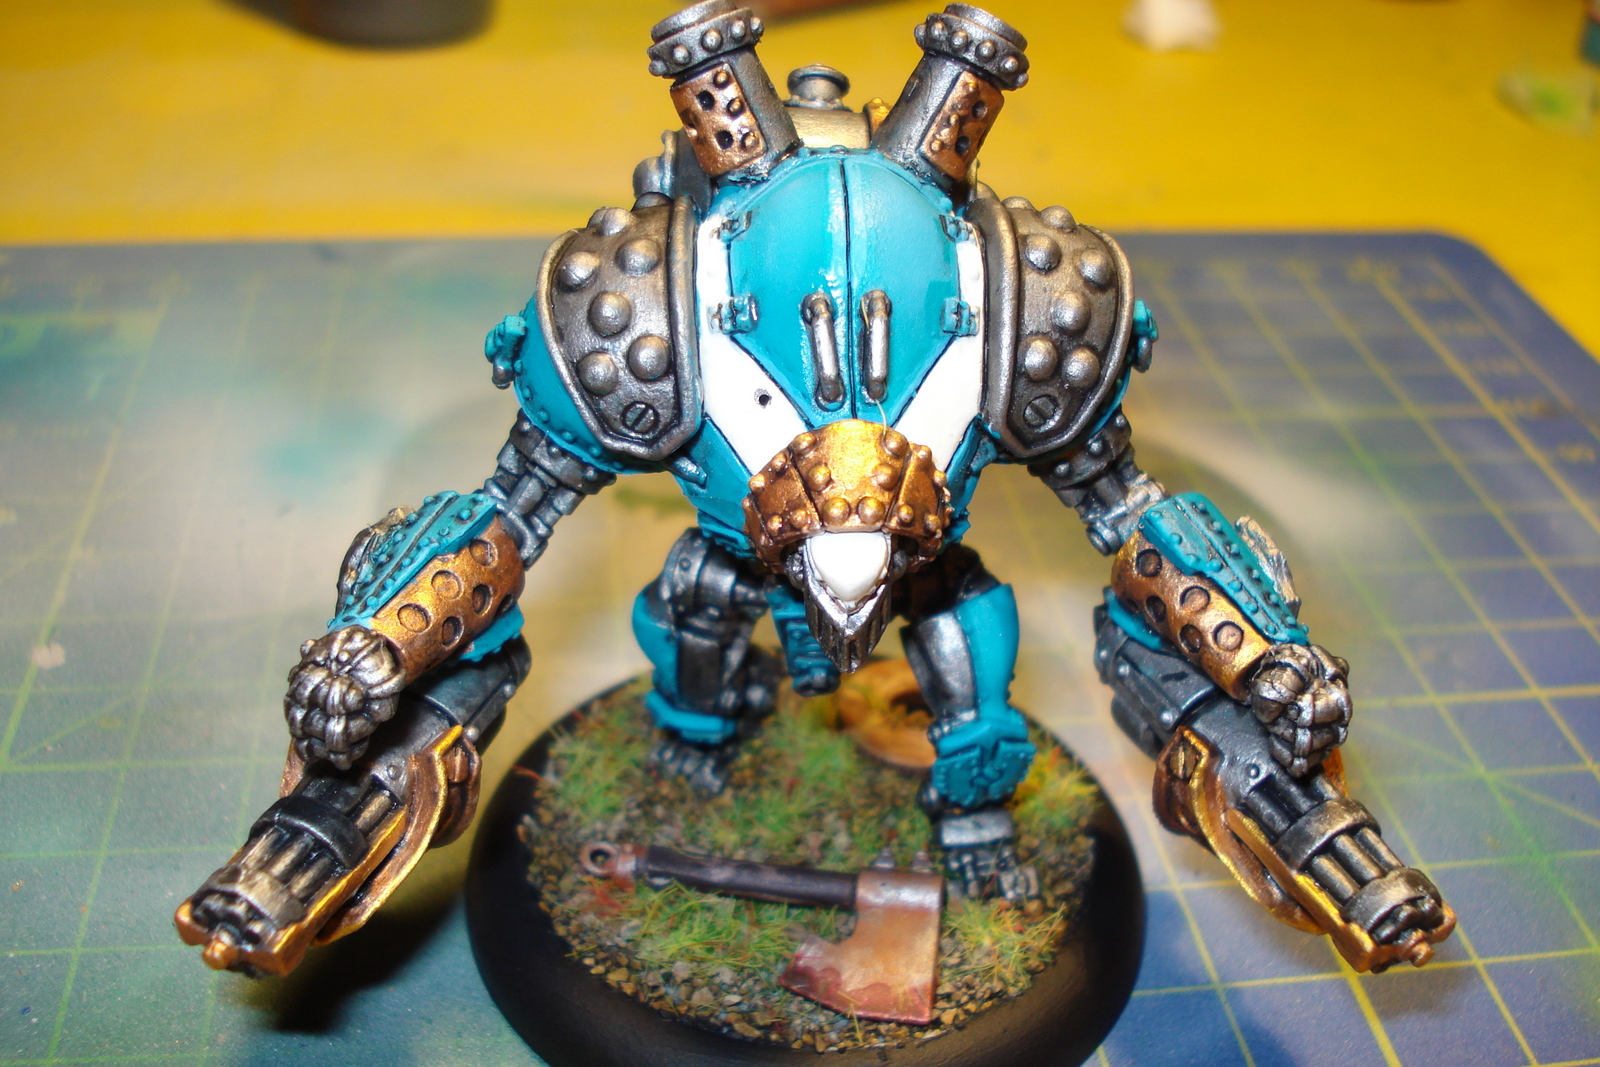
As my first ever Warjack, I wanted the pose of the mini to have a lot of character. The direction I was going in was an unstoppable juggernaut on the battlefield, mowing everything in front of him down in a hail of bullets, while slowly advancing.
 |
| Primed and ready for painting |
Then I applied the basecoat of Falcon Turquoise - there was a bit of overspray during this step, which can be fixed later.

To have a little contrast to the turquoise color, I added to stripes of ivory to the model, which broke the monotone coloring up quite nicely. To achieve a smooth coat, I applied the ivory in several thin layers. This was important, because on a model as large as this, even the tiniest brushstrokes are very visible.
I then applied Boltgun Metal on all metal parts of the model, taking care to water the paint down with "Magic Water" in a 2:1 paint to water ratio - I normally tend to go with a 1:1 mix, but with metal colors I find that if you add too much water, the covering ability of the paint really suffers greatly.


After all the metals were done, I applied Les' Heavy Body Black Wash generously to all the metal areas to get some definition. I also used it very carefully in all the recesses of the armor plates on the main body of the Cyclone, to separate those a little better.

I then went over the whole model, cleaning up the paintjob where some of the wash had gotten out of hand. I also started highlighting the edges of the armor plates first with a 1:1 mix of Falcon Turquoise and Electric Blue and finally with pure Electric blue. I also added in details like the eyes of the Warjack, the Barrels of the chain-guns. To highlight the silvery metals I drybrushed these areas carefully with first Chainmail Silver and then Vallejo Model Air Silver, to really bring these areas out.
 |
| The eyes are bascoated with Bloody Red, highlighted with Orange Fire and then dotted with Sunburst Yellow |
The Bronze areas where washed with a 1:1 mix of Devlan Mud and Ogryn Flesh and then hard edge highlighted with Glorious Gold.
When I was done with the paintjob I based the mini and then varnished it first with gloss and later with matte varnish to protect it. This turned out to be a mistake. NEVER varnish your mini after you added static grass. Turns out, there was some static grass loose on my desk and the varnish fused some of it to my Cyclone. I had to remove it with pincers which damaged the varnish a bit. I had to rescue the figure by adding some battle damage to mask the scene of the crime.
All in all a very nice model to paint and it gave me some valuable experience for my next Warjack. Until then and as always, enjoy and have fun,
IK-Painter
0 Kommentare:
Post a Comment