I've had the Triumph upgrade set for a while now, and didn't know if I wanted to build a Defender or a Triumph with the parts - but then I figured, why not magnetize the model, so I can play with both options?
First, I removed all the mold lines and overcast from the parts and then scrubbed them all in soapy water to wash off all the mold release powder - which was really heavy on this model.
 |
| All the necessary parts |
I then let it dry, before I layed out all the parts before I went to work on the magnetizing.
Some of the parts in the Triumph upgrade kit are really small, which would have been a real pain to magnetize - so I took the easy way out and cheated a bit. I used the Triumph head (which is way cooler than the Defenders anyway) and glued in all the upgrade parts of the cannon on the left arm.
So the actual magnetization was only done on the right arm of the model - specifically the hands and the shield.
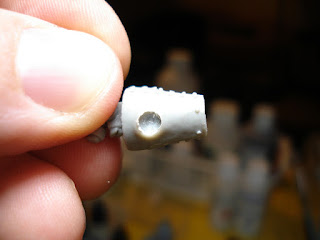
I started out drilling the necessary holes - one in the wrist, one on the side of the arm (where the big screw is) and one in the shield, using a 2mm drill bit and a electric drill. The places are really easy to find, cause the parts are molded to fit a certain way.
I then dryfitted all the magnets, making sure they would have a solid connection with each other. By putting a tiny amount of green stuff into the hole and adding superglue I achieved a rock-solid connection. Be careful when pressing the magnets in though, because the superglue can be almost impossible to get off of your fingertips - trust me, I know...
I first put the magnets into the arm and then added the magnets to the shield and hand options (open fist for the Triumph and a mace for the Defender). For the hands, I cut off the nubs that would normally would fit into the arm wrist slot and just glued the magnet on the now flush surface.
So you can see, in a few easy easy steps you can add a bit variety to your Jacks with minimal effort - and also can save a fair bit of money in the process, cause you'll only have to buy one Heavy Warjack instead of two :-). I hope this might help some of you,
as always, enjoy and have fun,
IK-Painter


0 Kommentare:
Post a Comment