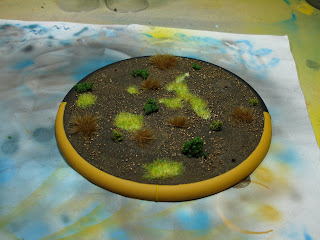
today I wanted to talk about creating a narrative by basing your miniatures. This topic shows, how far our hobby has come over the last 10 years or so. If you look at old pictures, specifically the ones on the boxes of old Games Workshop products, you will notice that they are all based very basically. Usually, the base was flocked, then painted and then drybrushed and the rim of the base painted a different color.
This is usually enough to make the miniature tabletop ready, but but after all the work you had painting the miniature it would be would be a missed opportunity, not to give the base some extra treatment. This way, you can create stunning narrative, which complements your paint job.
If you want to go the extra mile, is important to think about some things before hand. How many miniatures will you have to base this way? Will your way of basing look good on different size bases? Do you have enough supplies to make sure, that all the bases of your army look the same? Will the base complement the paint job of the models? Will you model the base by yourself or will you buy some premade resin bases? And most importantly, will you have fun doing these kinds of bases for your whole army?
1. The "basic" base
 |
| Old school basing - Courtesy of http://descansodelescriba.blogspot.de/ |
2. The "selfmade" base
 |
| A modeled base, sans narrative. |
 |
| The same base with bits added for narrative. |
3. The "premade" base
 |
| Resin base inserts - Courtesy of http://www.ironhalo.net/ |
But be prepared to put a lot of effort into these. They need to be cleaned, washed, primed and painted which can add to a lot of work. Also, if you want to start using these bases for your whole army you will need to stick with them to the end, because else there will be some huge discrepancies in the overall look of your forces.
But if you put the extra effort into them, they can look stunning. I used these kinds of bases for my Malifaux Neverborn Crew and am very pleased with them. Notice, how I vary the colors and style of the bases, but pulled them together by using the same color for the rim.
In the end, I would have the following suggestions:
Intricate and detailed resin bases are best for small skirmish type games, where you can put the extra effort into creating stunning pieces, which will complement your figures.
Selfmade bases, which can vary wildly in the effort you put into them, are great for larger armies by creating some stunning themes.
I would refrain from using only a very basic basing style, because this kind of work can really ruin the whole look of your army.
Cheers,
IK-Painter


0 Kommentare:
Post a Comment