Tuesday, March 12, 2013

From Zero to Hero: Cherub - Malifaux Neverborn Minion

Hey you guys,

it's been a while since my last update, but work has been crazy busy. So here's a quick one for you today: The Malifaux Neverborn Cherub Minion.

Apart from Baby Kade, this has to be the smallest figure I painted so far. As I've been using my airbrush for most of the figure, I'm really starting to get better on brush control when painting small areas at a time.

I cleaned and washed the mini, as the mold release agent really can screw up your paintjob. For added stability, I used a pin, which I glued below the pelvis of the figure. It's quite prominent now, but will be camouflaged during the painting process.


I used Vallejos Polyurethane Grey Primer as I wanted to achieve a neutral and muted look on this piece.


The Wings


I basecoated the wings with VMA White.


I then used VGA Sombre Grey for the lowest part if the wings and then added VMC Ivory for the upper sections. The mixes I used where 1:1 and then 3:1 Ivory to Grey.


When I was done I used a light drybrush of VMC Ivory to bring out the details of the wings and then used Vallejos Polyurethane Gloss Varnish to seal the paintjob, preparing for an oil wash later.


The Body


I basecoated the skin with VGC Dwarf Skin, adding lots of thinner to achieve a translucent mix, which I applied 2-3 coats. The mix was about 5 parts thinner to 1 part paint.


I used the same thin mixture of VGC Cadmium Skin and concentrated on the raised areas of the model. I took care of leaving the darker color in the recesses, for a nice shading effect.


For the extreme highlights, I used the same 5:1 mix of VMC Basic skin, applying it only to the areas the light would hit most, like the pot belly, buttocks and top of the head.


I then used some ground up violet artist pastels and applied it to the darkest shadows of the skin to create some visual interest in these areas. I also locked in the eyes, as at this stage I could fix any mistakes without ruining the rest of the paintjob.


I tried VMC Black as the color for the loincloth, but found the contrast to stark for this model. So I painted over this with VGC Sombre Grey, leaving some Black in the darkest recesses. I also locked in the rest of the details on the model, like the eyebrows and bow.
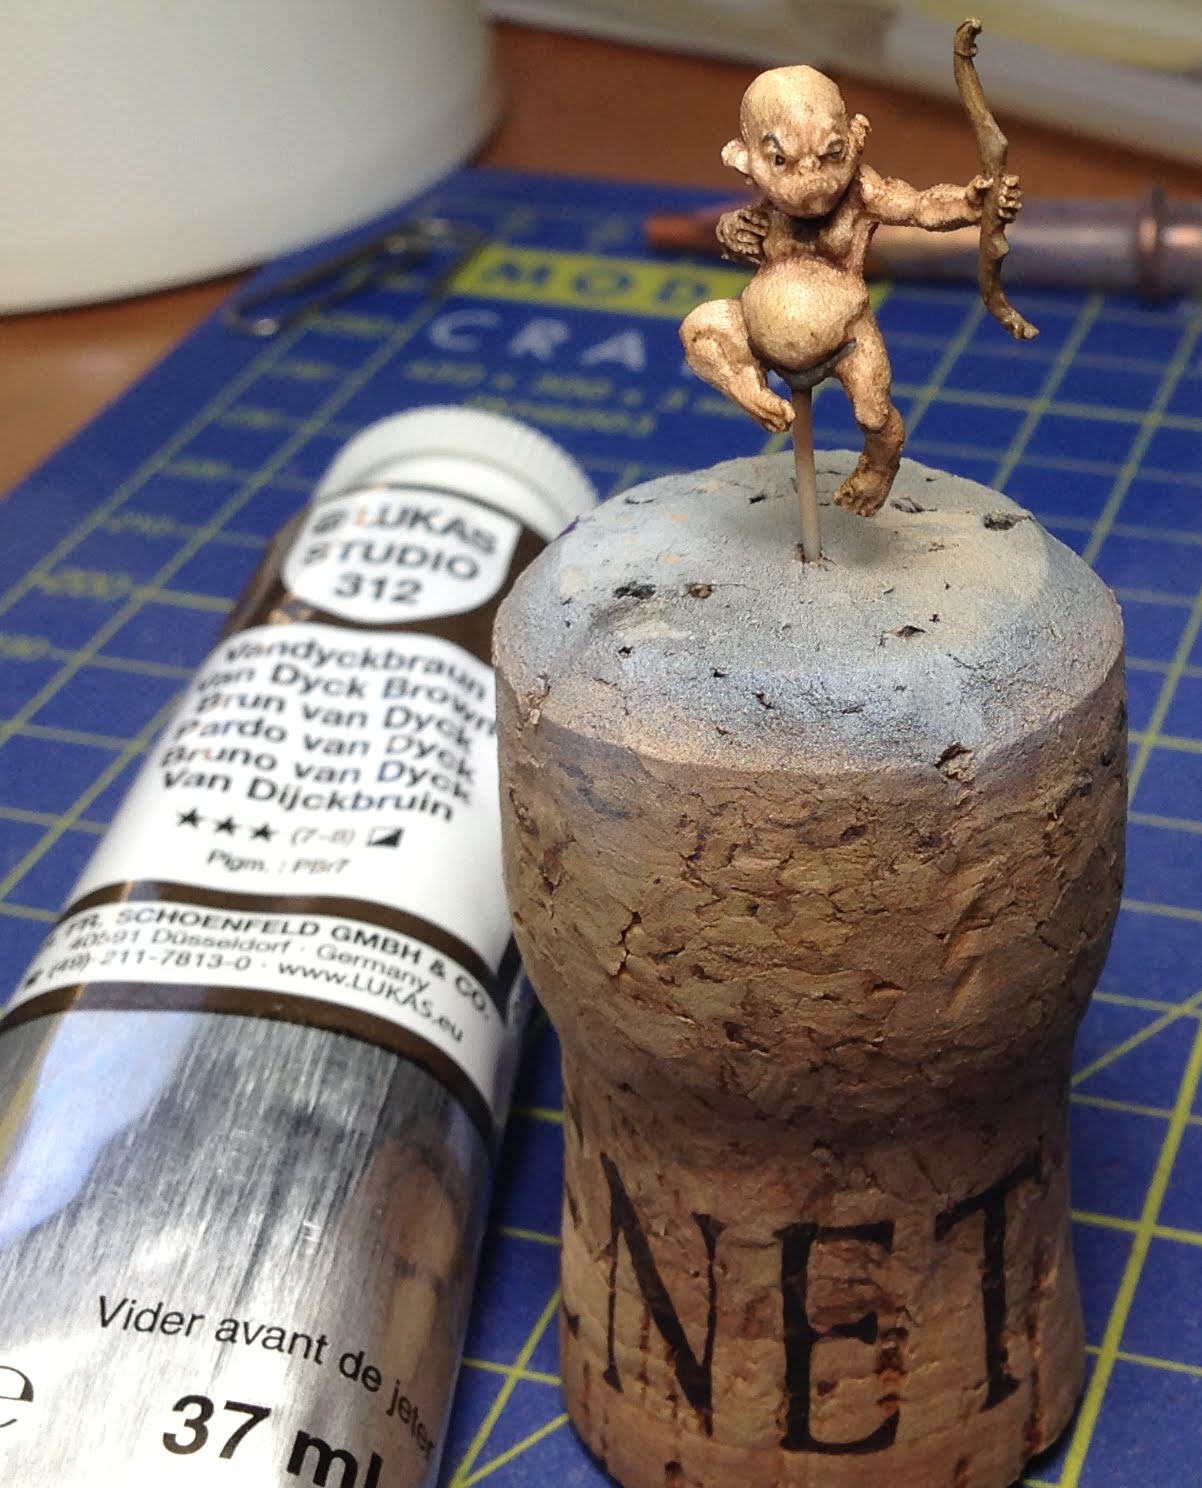

I made a thin oil wash with Van Dyke Brown and applied it liberally to the whole body and wings.


When the oil wash was dry, I used mineral spirits to clean the model, but took care not to remove too much of the wash, as I wanted the figure to have a dirty and grungy look.


For the base I used the same techniques as I've used on the rest of my Malifax Neverborn Crew. I also painted the pink black, which made i blend in more with the rest of the model and camouflaged it nicely.

I hope you enjoyed this small step-by-step as much as I enjoyed painting this figure.

Cheers,


IK-Painter

Monday, February 4, 2013

Product review: Ironhalo base inserts

Hey guys,

haven't done a review in quite a while and I have good things to say about the base inserts from ironhalo.net.

Check it out:


Cheers!

Saturday, January 26, 2013

From Zero to Hero: Weaver Widow - Malifaux Neverborn Minion

Hey guys,

unfortunately I've lost some pics of the Weaver Widow tutorial due to some HDD existence failure - but oh well, I hope you'll take something from it. And a small tip from me: always back up your data. I can't stress this enough. At least mirror all important files two times locally (on separate external drives) and once online. Then you can rest assured if something happens, you won't lose it all.

But onto the widow, one of the creepier sculpts I've seen so far in the world of Malifaux.

1. The prep

I started out using my Dremel to shave the contours of the shape of the dress of the mini into a premade resin base, so that it would be flush with the surface. For this, I used a sanding tool. which came with the Dremel set I purchased.


Easy and steady is the trick here, not to take to much off in one go. When I was satisfied with the fit I moved on.


For a secure fit, I used three pins in the bottom of the mini, so it would sit nice and safe.


I again used the Dremel to widen the holes for the arms, so that I could add some green stuff when I would assemble the mini.


I then mounted all the parts and got ready for painting.


2. The painting

I started out by priming the mini with Vallejos Polyurethane Grey Primer, as I wanted a neutral tone for my mini.


For the next steps, I made a small clip from the videos I could save:


As for the next steps:

I basecoated the skin areas with black for a high contrast.


Then I painted the borders of the dress with a 1:1 mix of VGC Squid Pink and VGC Hexed Lichen.


The small accents on the dress where painted with VMV Ivory and the whole mini was given an oil wash with a very light grey, to bring out the details without toning the model down too much.


And now for some final shots of the model:


The painting on this one was very fun, but the assembly was a pain in the butt - the arms I only got on by using a combination of green stuff and superglue, so you can imagine how difficult it was.

For a final touch, I varnished the model with Matte Varnish and then gave the skin areas a coat of Satin Varnish, to make them appear chitin like.

I hope you like it,

Cheers!

Friday, January 18, 2013

From Zero to Hero: Daydreams - Malifaux Neverborn Minions

Hey guys,

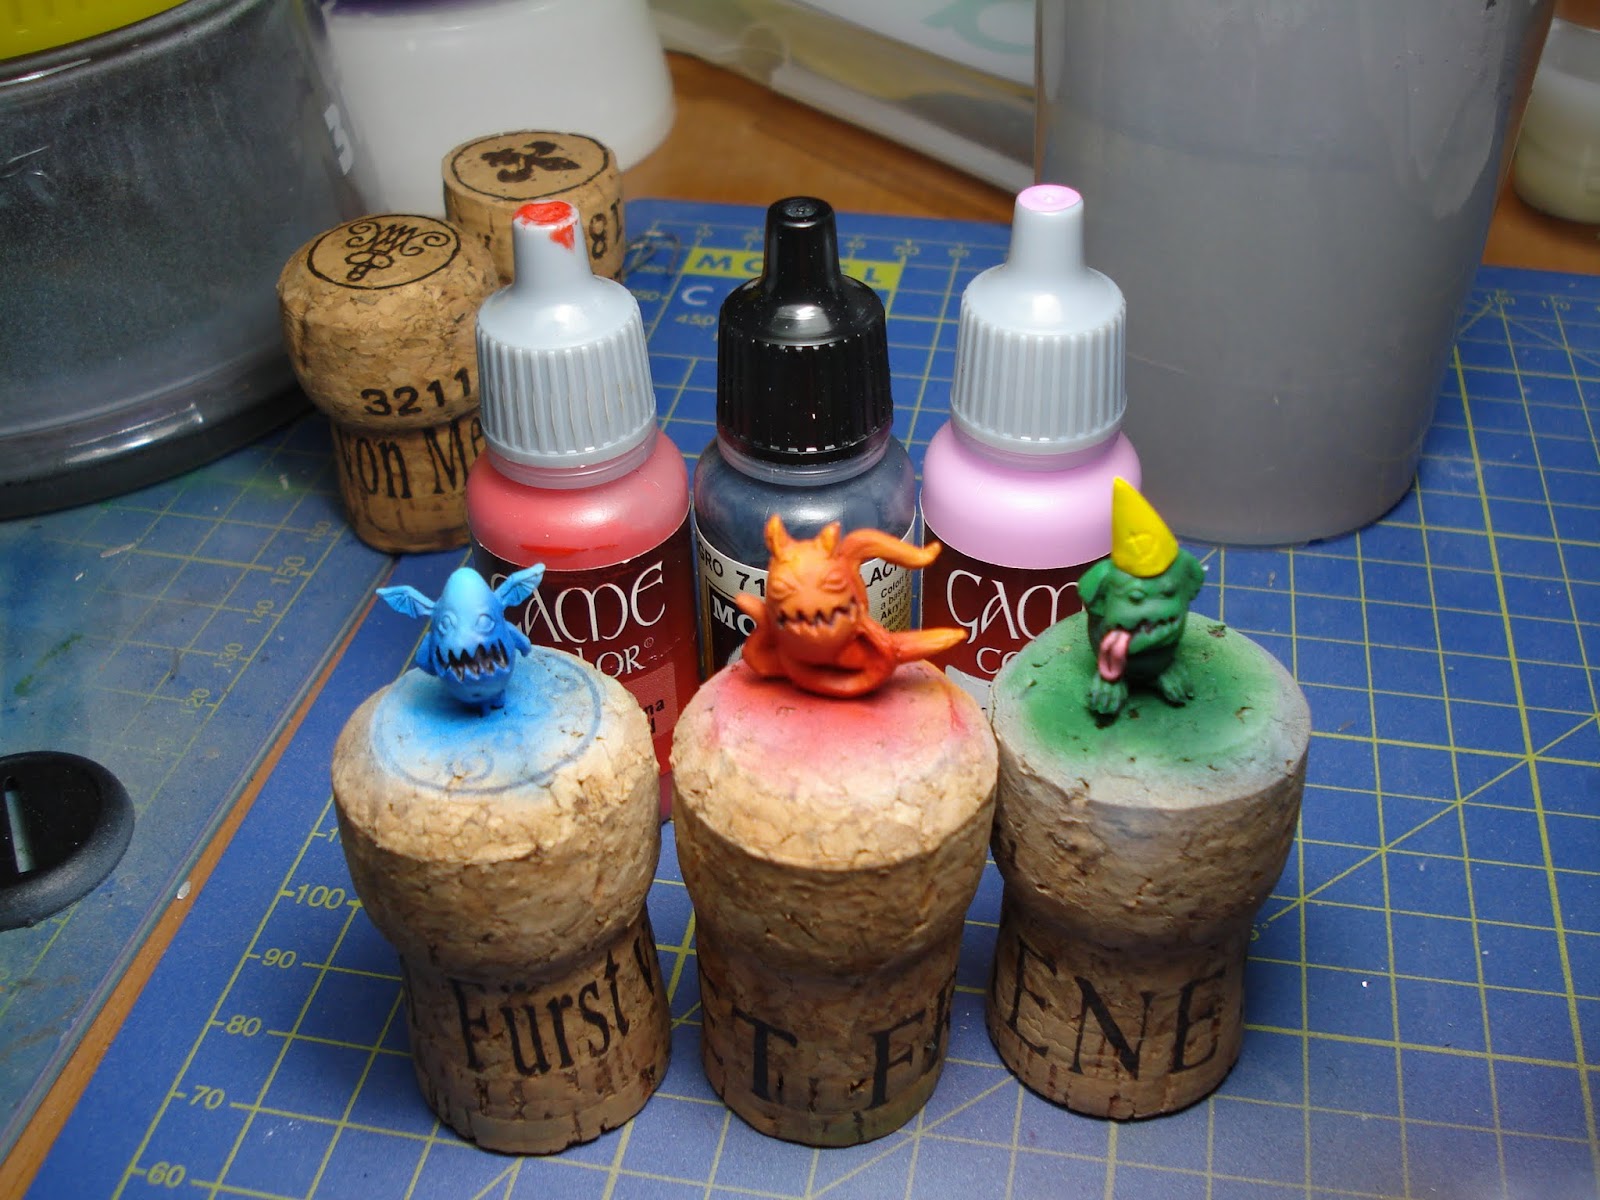
today I wanted to show you a simple way to paint the Neverborn Daydreams. I opted for an easy RGB color scheme, as that would really make them pop.

I started out priming them with Vallejo Polyurethane Grey Primer, as that would give the colors more vibrancy as when I would've used black primer.


I laid down the basecoats with my Infinity 2 in 1 CRPlus airbrush, using VGC Imperial Blue, VMA Red and VMA Olive Green


I highlighted the figures with VGC Ice Blue, VGC Orange Fire and VGC Sick Green.


For a nice contrast on the dunce cap, I masked of the figure and laid down a coat of VMA White, followed by two coats of VGC Sun Yellow.


The mouths were painted using a 2:1 mix of VMA Black and VGC Bloody Red, thinning the mix to almost a wash consistency, so it would flow nicely into the hard to reach areas. The tongue was painted with a 1:1 mix of VGC Squid Pink and VGC Bloody Red and shaded with the same mix I used on the mouths.


For added contrast, I painted the eyes on each model to stand out from the basecoat I used. Here I used VGC Scorpion Green, VGC Hexed Lichen and VGC Bloody Red.


The highlights of the eyes where done with VMC White, VGC Squid Pink and VMC Orange.


I decided to paint the bases and base inlays separately, as I want to achieve a more sombre town on the inlays and a more vibrant tone on the bases themselves.


Finally, I painted some details on the models, and glued them to the bases.

So there you have it, a really nice and easy paintjob which really helps to make these figures pop out on the table.

Tell me what you think. :-)

Cheers,


IK-Painter

Tuesday, December 25, 2012

Christmas came just right - Happy Holidays to you all!

Merry Christmas, you guys!

I hope you're having a great time with your families :-)

As for me, the Christkind was very kind this year and brought me something for my hobby:

The Vallejo Model Air Set, which comes in a really snazzy case.


I can't wait to try these paints out and will share my experiences with them. Especially the range of greens and browns is really impressive - and will come in really handy, when I'm painting my Malifaux Alps.

Cheers,


IK-Painter

Saturday, December 15, 2012

Kingdom Death: Monster - An awesome Kickstarter project!

Hey guys,

it's been a long time, but it was just crazy with work and preparations before the holidays. But hopefully I will find the time to update my blog more regularly in the future.

One thing I wanted to talk about today is an awesome Kickstarter a project I found and have been following for the last few weeks. I'm talking about the Kingdom Death: Monster board game.


The minis you get in this  kickstarter are really something else and quite stunning. They remind me a bit of the Malifaux range in terms of creepiness. Especially the monsters are really quite something else. I've been pondering for a bit if I wanted to get in on this kickstarter. There are risks involved. You have to pay up front and will get the product late (November) 2013. Also the shipping costs of $45 for international orders are quite high.

That on the other hand you get so much for your money. The sweet spot so far seems to be the Herald of Death pledge which costs 300 bucks. But if you add the cost of the survivor deluxe pledge which is $155 with the international shipping which is $45 your almost 2/3 there already.

For a better sense of what this package contains, take a look at this overview.

All in all it is a really nice package with stunning miniatures for quite a reasonable sum. I haven't pledged so far because I still want to see what other goodies this kickstarter has to offer in the future. But I think it's a given that you get a lot of bang for your buck in this.

Especially from a painting perspective these miniatures to look really, really nice and I'm really looking forward to getting them on my painting table.

Cheers,


IK-Painter

Sunday, October 21, 2012

From Zero to Hero: Coppelius - Malifaux Neverborn Minion

Hey guys,

today I wanted to show you, how I painted my Coppelius figure. In a previous post I stated, how much I hated putting this mini together. Because of that, I only did a very basic paint shop this miniature.


After assembly, I primed the miniature with Vallejos polyurethane gray primer.


I basecoated the coat with VGC Imperial Blue, the hair with VGC Sombre Gray and the skin with me VGC Stonewall Gray.


The coat was highlighted by mixing more and more VGC Magic Blue into the base color concentrating on the folds of the coat.


The trousers were basecoated with VGC Hexed Lichen. For the highlights I mixed VCG Squid Pink into the base color.


The skin was highlighted by glazing VMC White over the gray areas, which were raised to the light.


The eye was based with VGC White and a small amount of VGC Magic Blue was used for the iris. The pupil dot was made with VMA Black. I find it easier working with the Model Air colors because they are thinner and you have more control when painting very fine details.


After giving the model of a heavy coat of gloss varnish I used an oil wash to bring out the fine details.


As Coppelius has a very large fluff focus on eyes I  decided to do a slight OSL effect to bring out the eyes of this model. For this I mixed a very thin yellow (VMA Model Air thinned 2:1 with Vallejo Thinner) and applied this mix with my airbrush around the eyes. To highlight the eyes an to give the OSL a focal point, I added a small dot of a 1:1 mix of VMA Yellow and VMC White into the center of each eye. This is important as an OSL effect always goes from light to dark. If you want a glow, you'll need a brighter source for the glow, as otherwise the effect might look off.


All in all one of my less favorite models in the Malifaux range, but I think I captured some of the menace and grittiness of the figure.

Cheers,


IK-Painter

Saturday, October 13, 2012

Problems with Maelstrom Games

Hey guys,

Normally I would just write a review of an online store I have purchased something from. But these are special circumstances, because I have had so much problems with this particular service. I'm talking about Maelstrom Games.


Seriously, stay far away from these guys...

I have ordered a bunch of Malifaux and other hobbies supplies over 2 1/2 months ago. All these items were in stock (according to their website anyways) but the first shipment took quite a while to get to me. It seems that they didn't have all these items in the warehouse so they ordered them as soon as I ordered from them. Because of this, my order got split numerous times. Which might be a good thing in hindsight, because if the rumours around the Internet are true, Maelstrom Games is insolvent.

I have read quite an informative thread over on Dakka Dakka yesterday which highlighted the problems this particular online shop has had in the past.

So do yourselves a favor and stay away from this store, because I'm still waiting for part of my order. Granted, it's just a Malifaux 1.5 Rulebook out of a 200 GBP order, but it still sucks. I read read about some other guys ordered quite a bit of stuff in the last months and haven't received anything so far.

Cheers,


IK-Painter


Sunday, October 7, 2012

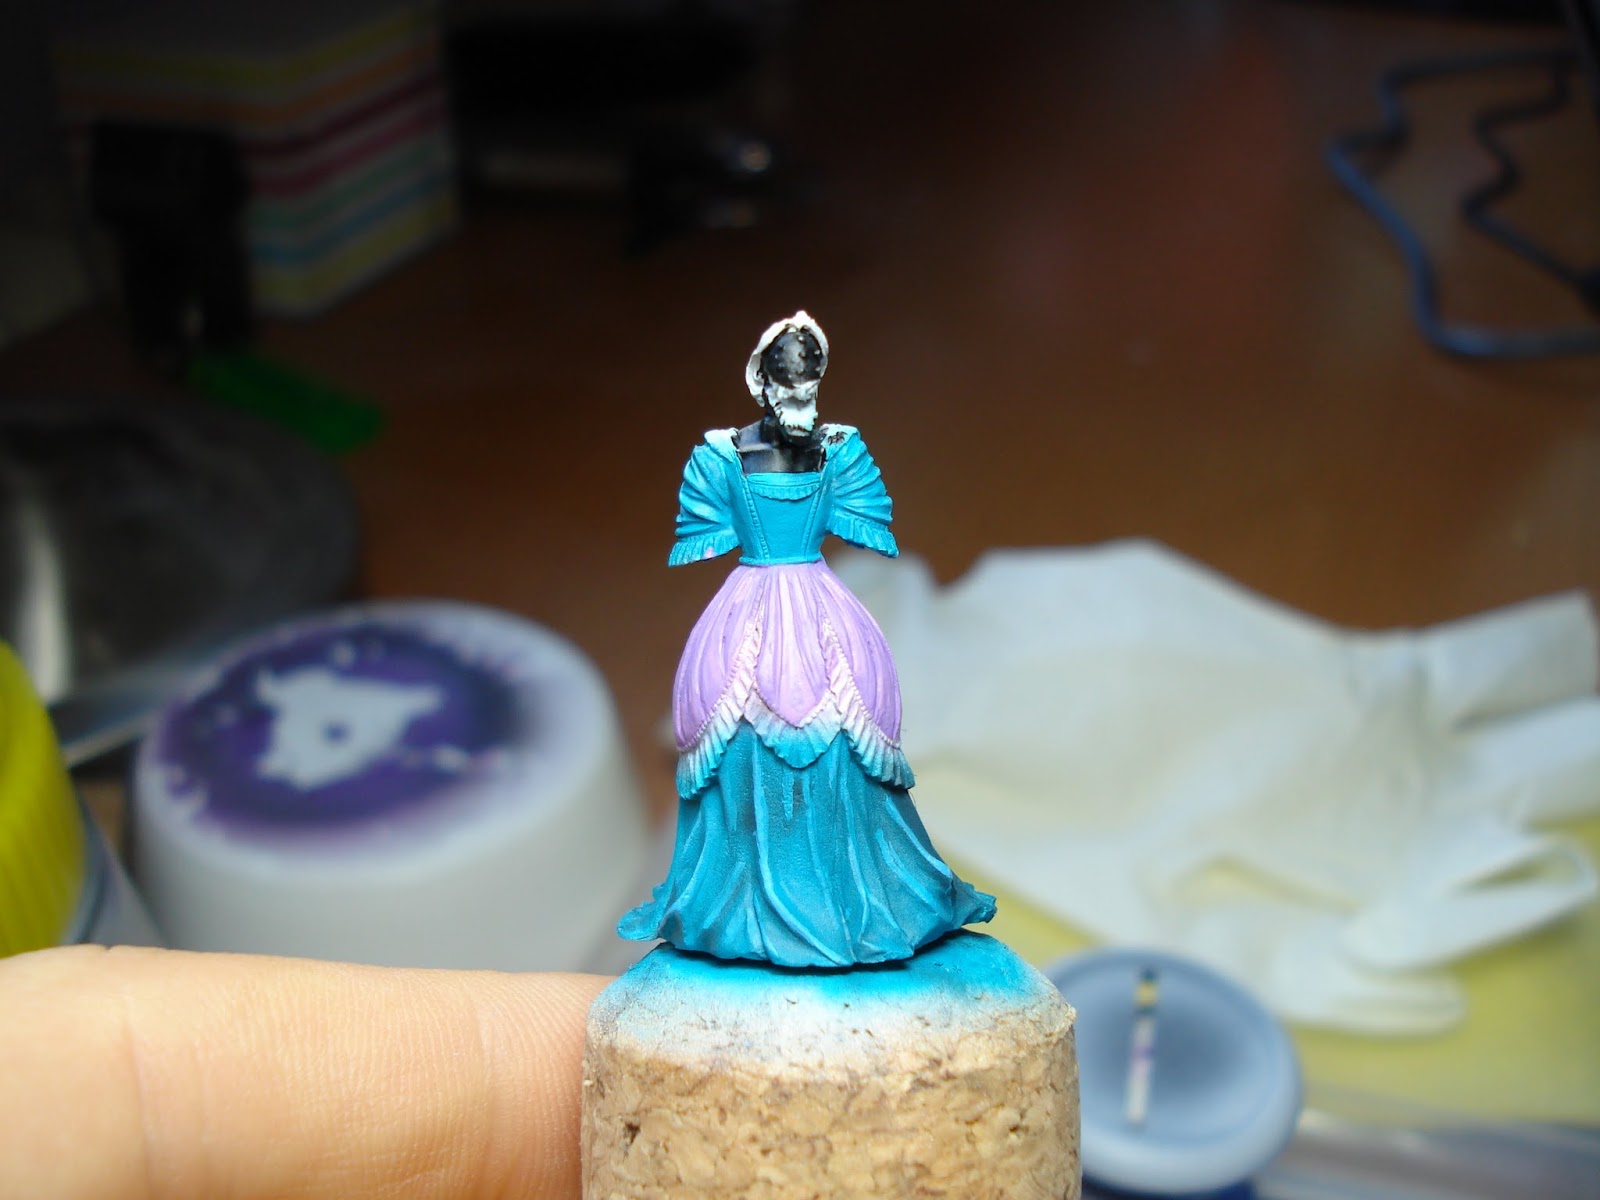
From Zero to Hero: Stitched Together - Malifaux Neverborn Minions

Hey guys,

today I wanted to show you, how I painted the Malifaux Stitched Together minions. I started out by pinning and mounting the miniatures to the corks, removing the mould lines and priming them with black surface primer.


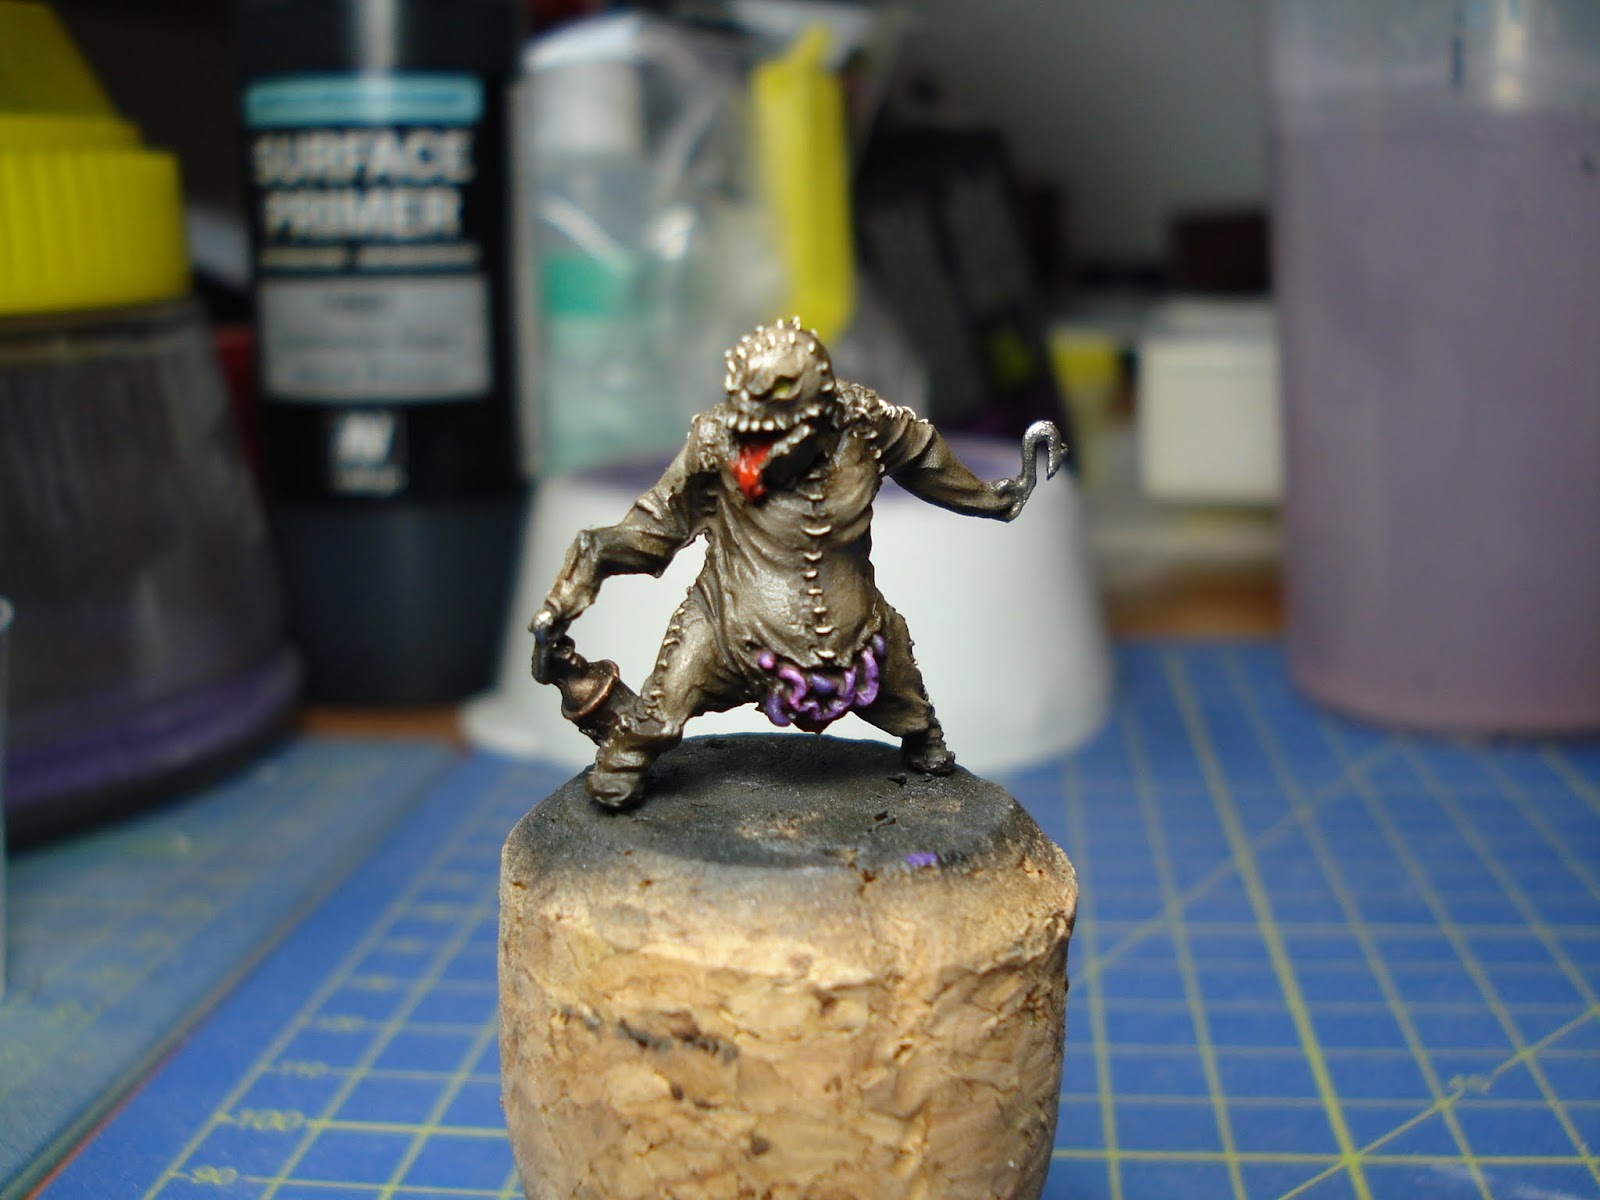
I then applied a basecoat with VMC Leather Brown to both the figures.


Highlights were achieved by adding the VGC Bonewhite to the brown basecolor. In several small increments, and the amount of Bonewhite  was heightened, until the last highlights was pure VGC Bonewhite.


You can see, that this made for a very fine and very smooth gradient in the highlight.


All the areas, where the stuffing of the Stitched Togethers shows through, was basecoated with VMC Vermillion.


I then added random spots of the VGC Hexed Lichen and VGC Squid Pink to the red areas, to make for a color variation in the internal organs and the gore which is shown.


The spine and various bone parts are painted with VGC Bonewhite.


The stitches, which hold these evil burlap sacks together, are painted with the VMC Ivory, to make a nice contrast to the main colour of the model.


The lantern on one of the minis is painted with a 1:1 mix of VGC Brassy Brass and VGC Black to make a nice dark metal basecoat.


The eyes of the figures are painted with VGC Livery Green.


I overpainted some of the areas when adding the VGC Livery Green, but I fixed this mistake again with the highlight color, which made a very nice effect. When adding high contrast colors too deep recesses in the model, it is always important to make a nice clean cut between the different colors,  so they will really pop.


When all the main colors where blocked in, I gave both figures a heavy coat of Vallejo Gloss Varnish.


The coat of varnish protects the model for the next step, a brown oil wash.


This wash was applied very liberal over the whole model, making sure to get enough shading in the deep recesses.


After the wash was dry to the touch, I cleaned it up with a bit of isopropyl alcohol and a make-up applicator.


For a bit of a OSL effect, I glazed VGC Livery Green over the eye area of the model. This was done in a lot of passes making sure that the later passes where concentrated on the areas closer to the eye, so it would look like that the brightest point is near the eye socket.


When I was satisfied with the shading, I gave the models a heavy coat of Matte Varnish.


I really love painting these figures. They were creepy and loaded up with the detail. And I really do think, that these two are some of my best work so far. I leave you with some shots of the finishing models.

Cheers,


IK-Painter